Military Model Scene
Robin Buckland's
FV432 Mk.3 Bulldog in 1/35...
...building the Takom kit

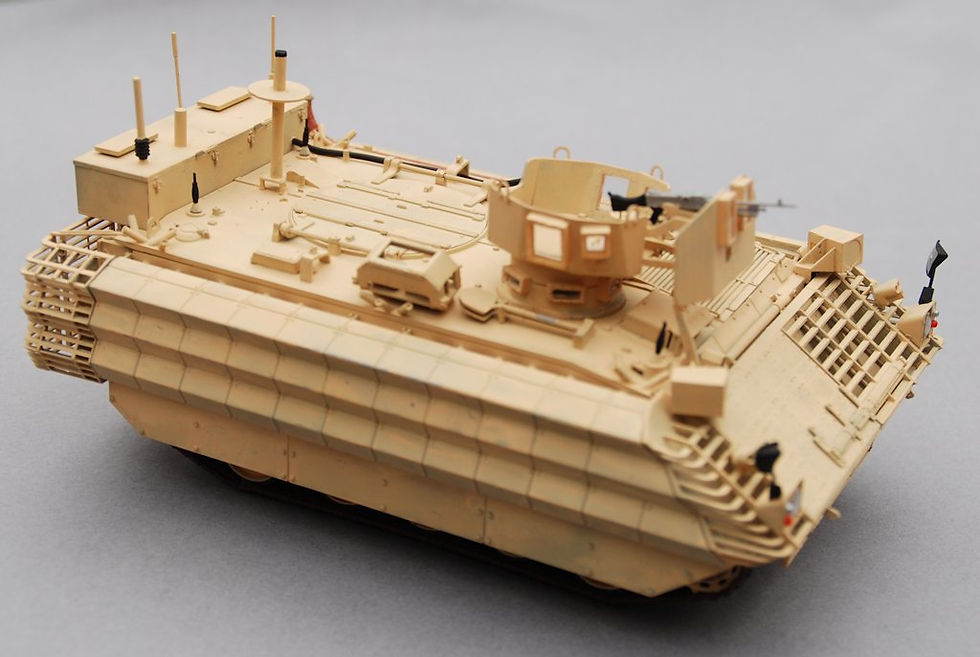
Following on from their kit of the British Army FV432, Takom did this updated 'Bulldog' variant, with extra armour all around and a new roof-top weapons station. In fact there are 3 options in the arrangement for the armoured cupola (as seen in the box art) or remote weapons stations fitted on the roof.
The FV432 first went into service with the British Army back in the early 1960s. It has been referred to as a 'Battle Taxi', to transport infantry on the battlefield, not an IFV (Infantry Fighting Vehicle) such as Warrior or the American Bradley and Russian BMP. It was designed to be able to fill a number of roles, including mortar carrier, command vehicle, ambulance and others. Around 3,000 were built and somewhere around half remain in service over 50 years after they were introduced. In the most recent period of its' service life there came the requirement for upgrades to cope with use in a very different operational environment to when it was first designed. This led to a new engine and the fitting of a newly designed external armour package in 2006 to give us the Mk 3 'Bulldog'. It carries an external armour package, including reactive armour elements, designed by the Israeli company Rafael, plus the addition of new RWS (Remote Weapons Station). It was in particular response to counter the use of the RPG7 used in Iran and Afghanistan by the insurgents there.
The kit is based around Takom's earlier release of the basic FV432, though the Bulldog does not include the interior detail featured in the earlier kit. Instead you get all the extra external fittings. One of the unusual features of the kit design is that a jig is provided for the assembly of the tracks and running gear, which can be built (and painted if you like) before being fitted to the hull. It may be a slightly unusual approach, but I found it works very well.
Usually I prefer to assemble a model prior to painting as paint on surfaces to be glued together can interfere with the assembly. However, I felt the running gear and tracks needed to be painted before fitting the side armour, as did the sides of the hull and internal surface of the side armour. For the British sand colour I used the Mission Models paint for it and like the matt finish.
There are elements that need painting before you can fit some of the front and rear elements of the extra armour. I've managed to get through that stage now and the final elements of the bar armour have been fitted across the back of the vehicle. Started painting some of those smaller details now, but not finished...
I bought mine through Tiger Hobbies Ltd.
Robin

Box art

Hull and stub axles

Hull and stub axles

Track building jig

Track building jig - tracks built to this stage, less the lower run

Track building jig - tracks built to this stage, less the lower run

Once dry, the assembled track sections, sprocket and idler removed from jig

Tracks installed on running gear.

Tracks installed on running gear.

Tracks installed on running gear.

Main hull done, but needs painting before fitting all the extra armour

Main hull done, but needs painting before fitting all the extra armour

Main hull done, but needs painting before fitting all the extra armour

Main hull done, but needs painting before fitting all the extra armour

Basic paint applied before fitting the side armour

Basic paint applied before fitting the side armour

Basic paint applied before fitting the side armour

Basic paint applied before fitting the side armour

Basic paint applied before fitting the side armour

Basic paint applied before fitting the side armour

Basic paint applied before fitting the side armour

Basic paint applied before fitting the side armour

Basic paint applied before fitting the side armour


